How to Measure Sight Height in Seven Easy Steps
Many rifle enthusiasts and hunters know the challenge of accurately measuring sight height — it’s a small detail but can make a big difference in aiming. You’re not alone; this is a common struggle for those wanting precise shooting setups.
To measure sight height in seven easy steps, start by selecting stable reference points with good contrast and visibility.
Position yourself on a steady, level surface, ensuring your eye is at the correct height.
Use a proper measuring tool, like a tape measure or laser, and keep it steady at eye level.
Identify and mark the target’s top, then align your sight with this point.
Double-check your measurements for accuracy, and if you keep going, you’ll uncover detailed tips to improve your results.
Key Takeaways
- Find a stable, clear reference point at eye level, ideally with high-contrast features so you can measure accurately.
- Use a measuring tool like a tape or a laser distance meter to measure straight up from your eye level to the reference point.
- Keep your posture steady and make sure the measuring device is aligned properly at eye height for the best results.
- Write down your measurement clearly, noting conditions like the lighting and exactly where you’re measuring to for consistency.
- Double-check your readings by measuring again and compare with digital tools if available to ensure accuracy.
Why Measuring Sight Height Matters

Understanding why measuring sight height matters is essential because it directly impacts your ability to plan successful shots or alignments. Your visual perception relies heavily on knowing your sight height accurately, as it affects how you interpret distances and angles.
When your sight height isn’t measured properly, your measurements can be misleading. This can lead to errors in positioning or aiming, which might cost you time or precision.
Getting measurement right ensures your calculations match reality. This helps you avoid costly mistakes and makes your work more reliable. Whether you’re working on construction or aiming through a scope, knowing your sight height precisely keeps your line of sight consistent.
Even a small discrepancy can create big errors, especially over long distances or complex setups. Focusing on precise measurement boosts your confidence and reduces guesswork.
In the end, understanding why measuring sight height matters helps you achieve more accurate, dependable results in any activity that depends on visual perception and spatial accuracy.
Understanding the Basics of Sight Height Measurement
Measuring sight height accurately means figuring out the vertical distance between your eye level and a specific reference point, like the ground, a bench, or a marker. To do it well, you should understand some basic ideas.
First, your depth perception helps you judge distances so you measure the right height relative to your target. Second, good visual clarity is important for spotting exact points on the reference marker. Third, keeping your eyes steady helps reduce errors during measurement.
Fourth, knowing your eye level allows you to measure consistently from the same spot each time. Remember, accuracy depends on focusing on depth perception and clarity, which help you identify the right reference points and measure precisely.
Tools You Need for Accurate Measurement
To get accurate sight height measurements, you’ll want to have some basic tools on hand, like a good measuring tape or maybe a laser distance meter if you prefer something more high-tech. It’s really important to make sure these tools are properly calibrated so you don’t run into errors or inaccuracies.
When your tools are dialed in and reliable, it becomes much easier to confidently measure sight height every single time. Just take your time, double-check your equipment, and you’ll get precise results without any hassle.
Essential Measurement Tools
Have you gathered the right tools to ensure your sight height measurements are accurate? Essential measurement tools really make a difference.
First, a sturdy measuring tape or ruler is key for precise measurements, especially when measuring height in inches or centimeters.
Second, choose a tool with good color contrast, like a high-contrast marker or tape, to clearly mark reference points.
Third, a spirit level helps keep your measuring device perfectly horizontal, preventing errors.
Fourth, consider using a chalk line or laser level for marking straight, visible lines across the space.
These tools work together to improve accuracy, making your sight height measurement straightforward and reliable.
Always opt for tools that give clarity and precision, and double-check your measurements for the best results.
Tool Calibration Tips
Ensuring your tools are properly calibrated is essential for accurate sight height measurements. Start with calibration methods that suit your tools, like using known reference points or calibration boards regularly.
Check your level and measuring tape for distortions or damage before each use, and re-zero or recalibrate as needed. Proper tool maintenance is key — keep tools clean, store them properly, and avoid exposing them to extreme temperatures or moisture.
Regularly inspecting and maintaining your equipment helps keep measurement accuracy consistent. If you notice inaccuracies, recalibrate immediately.
Keeping your tools in good condition and following reliable calibration methods will help you get precise, dependable sight height measurements every time.
Finding the Right Reference Points
Here are key tips:
- Choose a point with high color contrast, like a white mark on a dark wall.
- Select surfaces that have minimal texture differences so you don’t get confused.
- Pick unobstructed points that stay clear from your position.
- Use prominent features such as door frames or light switches that won’t shift or change.
Preparing Your Equipment and Positioning Yourself
To accurately measure sight height, you need to prepare your equipment and position yourself correctly. First, check that your tools—like a level, measuring tape, and tripod—are in good shape and securely set up. This helps prevent accidents and measurement errors.
Next, find a stable, level surface to set up your tripod. Stand straight with your eyes at the same height as your reference point, keeping good posture for consistency. Proper positioning now saves you trouble later on.
Here’s a quick checklist:
| Equipment | Safety Tips | Positioning Tips |
|---|---|---|
| Level, Tape Measure | Check for damages | Stand on stable ground |
| Tripod | Secure firmly to prevent slipping | Keep your body upright |
| Marking tools | Keep away from hazards | Align your sight naturally |
| Notepad | Store safely after use | Stay relaxed and steady |
| Laser device (if used) | Test before starting | Face the target directly |
Proper prep minimizes errors and helps ensure precise sight height measurements.
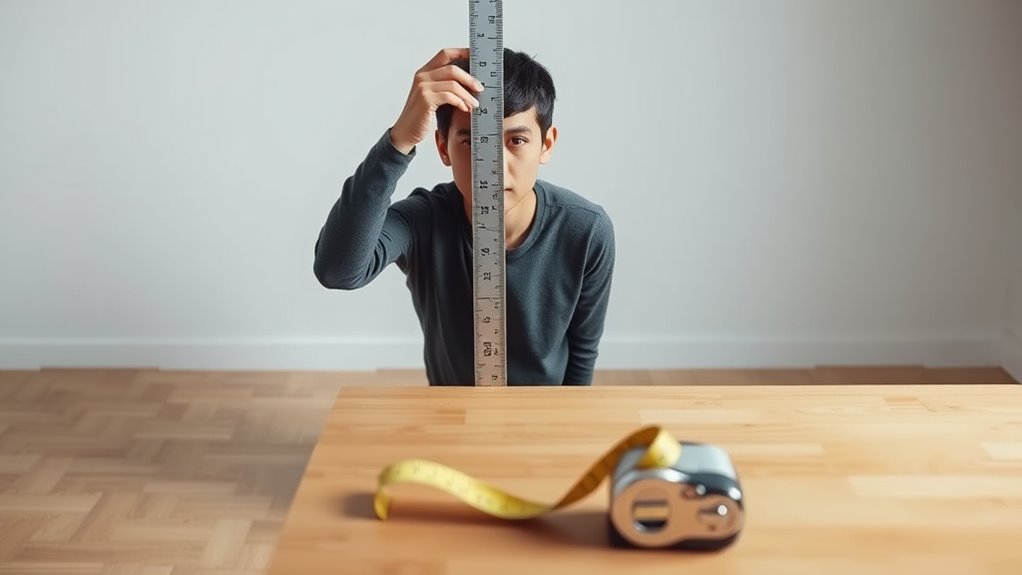
Measuring Your Eye Level From the Ground
After securing your equipment and positioning yourself properly, the next step is to measure your eye level from the ground. Getting this right is key to accurate sight height measurement.
Stand upright on a flat surface, making sure your posture is natural. Place your head against a stable surface or hold a ruler vertically aligned with your eye.
Keep your gaze level, avoiding tilting your head up or down. Then, mark or note the ground level directly below your eye height using a ruler or measuring tape held vertically at your eye level.
Locating and Marking the Target’s Height
Once you’ve identified the target, find a stable point at its top where you can mark its height. Proper positioning is key for making your measurement accurate.
Use a fixed, sturdy object at the top—like a flagpole, tree branch, or another unmovable marker—that clearly shows the highest point.
To ensure precision, measure the height from the ground using a tape measure or leveling tool. Mark that point with chalk, tape, or spray paint so it’s easy to see during your sighting.
Keep your markings consistent and visible. The goal is to select a reliable, stationary point that won’t shift or blur the target’s top line.
Accurate target marking makes the next steps easier and improves overall measurement accuracy. Take your time to find a precise, stable reference point for the best results.
Aligning Your Sight and Taking the Measurement
Begin by aligning your sight with the marked point at the top of the target. Make sure you’re wearing safety glasses to protect your eyes from any debris.
Hold the measuring device steady at eye level, with measurement units clearly visible. Keep your eye aligned with the sight line and the marked point on the target.
Take a deep breath and gently look through the sight, avoiding excessive movement. Then, record the distance between your eye and the top of the target using inches or centimeters.
Maintaining a steady stance and consistent eye position is key for accuracy. Always wear proper eye protection during this process to prevent irritation.
Ensure the measuring device is precise and easy to read so your sight height measurement is as accurate as possible.
Recording and Verifying Your Measurements
When you’re taking your measurements, it’s really important to write everything down clearly. This way, you won’t get confused later on.
Next, take a moment to double-check your recorded figures. Make sure everything looks right and that there aren’t any mistakes.
Having accurate recordings and verifying them helps ensure that your sight height measurement is dependable and correct.
Document Your Measurements Clearly
Accurately recording your measurements is key to verifying precise sight height calculations. Clear documentation helps prevent errors and keeps everything consistent. Use good measurement techniques, like steady hands and proper tools, to improve accuracy. Highlight important details with color contrast, like marking notes in bright ink or using colored tabs for quick reference.
To stay organized, follow these simple steps:
- Write down the exact measurement in a notebook or digital file.
- Use labels or color-coded tags for each step.
- Record measurement conditions, such as lighting and measurement methods.
- Double-check your entries for consistency and clarity.
Cross-Check for Accuracy
Once you’ve documented your measurements, the next step is to cross-check them for accuracy. Start by reviewing each measurement carefully, making sure there were no recording errors. Check that you’ve corrected for parallax by viewing the scale from the correct angle—that helps minimize discrepancies.
Also, verify your measurements under consistent lighting conditions to avoid shadows or glare that could affect your readings. If your measurements differ significantly from previous attempts, repeat the process and compare results.
Use a nearby reference point to confirm your measurements’ consistency. Cross-checking in this way helps ensure your sight height data is precise and reliable. This meticulous verification saves time and effort later, giving you confidence that your measurements are accurate.
Tips for Accurate Sight Height Measurements
Getting precise sight height measurements requires careful attention to detail and consistent techniques. To improve accuracy, consider these tips:
- Use augmented reality tools for real-time visualization, making sure your measurement lines up perfectly with the target.
- Implement eye tracking technology to monitor your gaze consistently, which helps reduce errors from shifting focus.
- Keep your measuring device at eye level for a stable, accurate reading and to avoid parallax errors.
- Double-check your measurements by repeating the process and cross-reference with digital tools for validation.
These methods help minimize errors and ensure you get reliable results. Augmented reality and eye tracking are especially helpful because they give visual feedback and precise data collection.
Stay steady, be consistent, and verify your measurements regularly to boost accuracy and confidence in your sight height data.
Frequently Asked Questions
Can Weather Conditions Affect Sight Height Measurements?
Weather conditions can greatly affect sight height measurements. Fog, rain, or strong winds can make it hard to see clearly and keep your measuring tools steady.
When conditions are poor, images may get obscured or distorted, and your stability could suffer. To get the most accurate measurements, it’s best to measure on clear, calm days to reduce the weather’s impact.
How Often Should I Recalibrate My Measurement Tools?
Think of your measurement tools as your compass, guiding your accuracy; they need regular calibration to stay reliable.
You should recalibrate your tools every few months or after any big impact, weather change, or if you notice inconsistencies.
Keeping your tools properly calibrated is key to accurate measurements, so your results stay trustworthy over time.
Regular checks help catch errors early, keeping your measurements precise and dependable, like a finely tuned instrument.
Is Special Training Needed to Measure Sight Height Accurately?
No, you don’t need special training to measure sight height accurately, but understanding equipment calibration is essential for measurement precision.
When your tools are properly calibrated, you can confidently take accurate measurements without a lot of training. Focus on learning how to handle your measurement equipment correctly.
Make sure to verify it’s calibrated regularly and follow precise procedures. This approach helps you get consistent, accurate sight height readings without needing specialized skills.
Can Sight Height Vary With Different Types of Firearms or Scopes?
You’ll find that sight height can change based on firearm types and scope variations. For example, rifle scopes may add a different sight height than traditional iron sights, which can impact your aim.
Different firearm designs, like bolt actions versus lever actions, also influence sight height. These differences mean you should always measure sight height for each firearm and scope combo to ensure accurate shooting, especially at varying distances.
What Errors Are Common During Sight Height Measurement?
Common errors during sight height measurement include miscalculating measurement accuracy and overlooking equipment calibration. You might underestimate or overestimate slightly if your ruler isn’t properly calibrated or if your measurements aren’t precise.
Always double-check your equipment calibration and measure carefully to avoid these errors. Inconsistent positioning or reading mistakes can also affect accuracy, so keep your posture steady and stay focused throughout the process to get reliable results.
Conclusion
As you wrap up your measurement journey, remember that sight height acts as your guide to precision—keeping everything clear. Each point you measure becomes a vital connection, leading you toward accurate results.
Treat each step like a beat in a steady rhythm, flowing smoothly from one to the next. This rhythm helps your process feel natural and confident.
Finally, with patience and focus, your sight height becomes a reliable symbol of accuracy—steady and unwavering in every measurement.