How to Remove a Gun Safe Door in Seven Easy Steps
Many people find removing a gun safe door daunting, especially if you’re not sure where to start or worried about safety. You’re not alone—this process can be tricky if you’re unfamiliar with it, but with a few simple steps, you’ll get it done smoothly.
To remove a gun safe door in seven simple steps, start by verifying the safe is unloaded and secure your workspace with tools and padding.
Open the door fully, inspect hinges and bolts, then loosen and carefully detach the hinges while supporting the door’s weight with straps or help.
Check the door and safe for damage before storing or reinstallation.
Following these actions guarantees safety and efficiency—you’ll learn how to handle any challenges that may come up.
Key Takeaways
- Make sure the safe is completely unloaded and turn off any security systems before trying to remove the door.
- Grab the right tools like screwdrivers, pliers, and supports. Set up a clean, organized workspace to keep things simple.
- Open the door fully, check the hinges, and add some lubrication if needed before taking out the bolts.
- Support the door well using straps or ask someone for help before carefully detaching the hinges.
- When the door is free, store it flat and protected. Label it clearly so you can reinstall it easily later.
Why You Might Need to Remove Your Gun Safe Door
Have you ever needed to remove the door of your gun safe? Sometimes, it’s necessary for maintenance, repairs, or upgrades.
You might also remove the door to reach areas inside the safe that are hard to access or to move it through tight spaces safely. Understanding firearm regulations helps you do this legally and responsibly.
Removing the door requires careful safety precautions to avoid accidental damage or injury. If your safe has a locking mechanism or security features, taking off the door might be needed to troubleshoot or replace parts without compromising safety.
Always make sure the safe is unloaded before working on it. Following firearm regulations is key, especially if you’re transporting or relocating the safe.
Ultimately, removing the door is about maintaining safe, secure storage while following proper safety steps every time.
Gather the Right Tools for Safe and Efficient Removal
Before you start removing the gun safe door, it’s important to gather the right tools to ensure the job is safe and efficient. Start with basic hand tools like screwdrivers, pliers, and a socket set—these are essential for removing hinges and bolts.
Choose tools that fit comfortably in your hand to promote ergonomic techniques, reducing strain and preventing injury during use. Prioritize tool safety by inspecting your tools beforehand to make sure they’re in good condition. Use safety glasses if needed.
Having your tools organized and easily accessible will make the removal process smoother and avoid unnecessary frustration. Avoid makeshift tools or using excessive force, as this can damage the safe or cause injury.
Properly selecting and handling your tools, while following ergonomic techniques, makes the task safer and more efficient. It helps the project go more smoothly and reduces the risk of accidents.
Prepare Your Workspace to Ensure Safety
To guarantee safety while removing a gun safe door, you need to prepare your workspace carefully. Start by clearing the area of any clutter to prevent tripping or accidental damage. Organize tools and parts nearby so everything you need is within reach, reducing distractions during removal.
Use safety precautions like gloves and eye protection to shield against sharp edges or debris. Guarantee the floor is dry and stable to support the safe handling of heavy components.
Here’s a quick guide to workspace organization:
| Safety Precautions | Workspace Organization |
|---|---|
| Wear gloves and eye protection | Clear unnecessary items from the area |
| Use proper lifting techniques | Keep tools and parts in designated spots |
| Guarantee good lighting | Maintain a clean, dry, and stable floor |
| Work in a well-ventilated space | Double-check for obstacles |
A well-prepared workspace minimizes risks and makes the removal process smoother and safer.
Secure the Safe and Protect Surroundings Before Removing the Door
Ensuring the safe removal of the gun safe door starts with securing the safe itself and protecting your surroundings. First, confirm the biometric security system is deactivated to prevent any accidental openings or alerts during the process.
Check that the fireproof lining inside the safe is intact and won’t be damaged during removal. Clear the area around the safe of fragile belongings or items that could be damaged or cause injury if knocked over.
Use protective gear like gloves and safety glasses to avoid injury from sharp edges or movement. Setting up a sturdy support, like a moving blanket or padding around the safe, can help cushion accidental impacts.
Make sure the floor and nearby surfaces are stable to prevent shifting. Taking these steps helps safeguard both the safe and your environment, reducing the risk of accidents or damage as you proceed with removing the door.
Fully Open the Safe Door to Access Hinges and Bolts
Once the safe door is fully open, you get clear access to the hinges and bolts that hold it in place. This step is important for inspecting and preparing for hinge lubrication or bolt removal.
Opening the safe door fully provides clear access to hinges and bolts for inspection, lubrication, and removal.
With the door open, you can see the hinges more clearly, making it easier to check their condition and ensure they move smoothly. Applying hinge lubrication now can help prevent squeaks or resistance later.
The exposed bolts are now ready for removal. Loosening or taking them out becomes straightforward with full access. Just be careful to keep the door steady as you work around these components.
Taking this step ensures you’re prepared to move forward without any unnecessary trouble. Fully opening the door is essential for a smooth removal process, giving you the visibility and space needed to handle hinges and bolts easily.
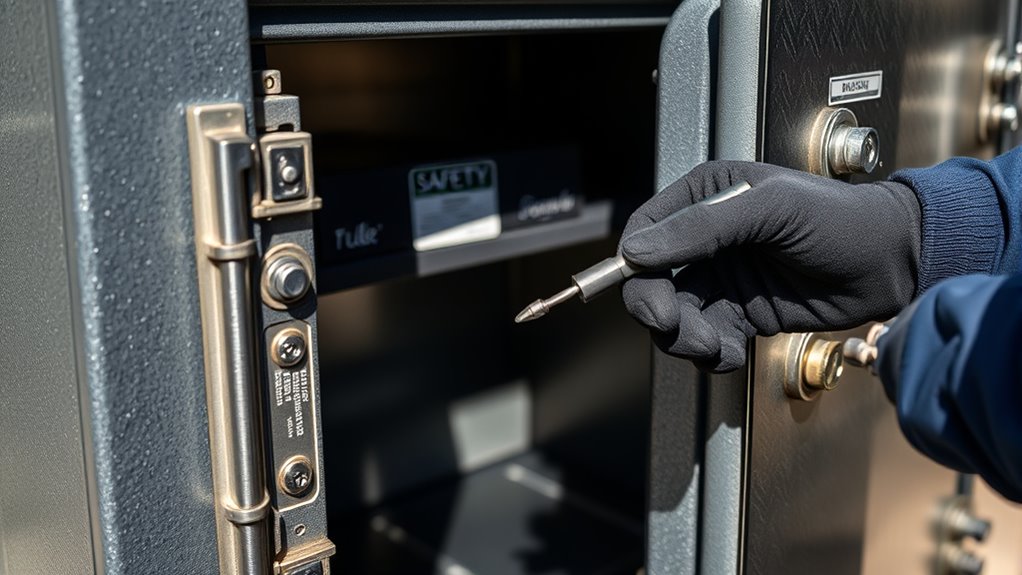
Loosen and Remove Hinges or Bolts Holding the Door
With the door fully open and the hinges clearly visible, you can now focus on loosening and removing the hinges or bolts that secure the door in place.
Use a screwdriver or socket wrench to carefully loosen the bolts holding the hinges. Keep track of these parts for reassembly or replacement.
Regular hinge maintenance ensures smooth operation and prevents damage to the lock mechanism or hinges themselves. If bolts are stubborn, apply a penetrating lubricant and wait a few minutes before trying again.
When removing the hinges, support the door to prevent it from falling.
| Step | Action |
|---|---|
| 1 | Identify and access hinge bolts |
| 2 | Apply lubricant if bolts are tight |
| 3 | Use the correct tools to loosen bolts |
| 4 | Remove bolts carefully |
| 5 | Support the door during hinge removal |
Carefully Detach the Door and Support Its Weight
Before you start taking the door off, it’s a good idea to see how the weight is spread out. That way, you’ll know what to expect and can prevent anything from falling unexpectedly.
Gather some support tools like straps or have a helper on hand to hold the door securely. It’s really important to keep the door supported as you detach it, so nothing gets damaged or someone ends up hurt.
Assess Door Weight Distribution
To safely detach the door, start by evaluating how its weight is distributed. Understanding this helps prevent accidents and ensures proper support during removal. Carefully examine the hinge area and the overall door structure.
Use your hand or a level to gauge if the door’s weight shifts toward the top, bottom, or center. This helps you identify where to place supports later.
| Part of Door | Approximate Weight | Distribution Balance |
|---|---|---|
| Hinge Side | 40% | Heavier, needs support |
| Center of Door | 30% | Balanced |
| Handle Side | 30% | Lighter, but still cautious |
Knowing your door’s weight distribution allows you to plan the correct support points, making removal safer and more efficient.
Prepare Support Tools
Since removing a gun safe door involves handling significant weight, you should gather and prepare the appropriate support tools beforehand. Start with sturdy support wedges or a clamp to hold the door steady once detached.
Use a removable brace or a large cloth to cushion interior insulation and prevent damage. If the hinge mechanisms are exposed, have a wrench or screwdriver ready to carefully unscrew hinges or pins.
Consider a dolly or lifting straps for safer handling and to reduce strain. Protect delicate components like interior insulation by placing padding where needed.
With these tools prepared, you’ll be ready to carefully detach the door while supporting its weight, preventing damage or injury during removal.
Secure Door During Removal
Once you have your support tools ready, carefully start detaching the door by unscrewing or removing the hinges.
To guarantee door security during removal and make maintenance safer, always support its weight.
Keep these steps in mind:
- Use a helper or hoist to hold the door steady.
- Place padding or blankets under the door to stop any damage.
- Maintain a firm grip on the door and avoid sudden moves.
- Detach hinges slowly, supporting the weight as you take out each screw.
Inspect the Door and Safe for Any Damage or Issues
Before trying to remove the gun safe door, take a close look at both the door and the safe for any damage or issues. Check for paint peeling, which could show signs of wear or previous damage that might weaken the structure.
Look for rust or corrosion around the hinges, locks, and frame areas. Rust can make the door less stable and could make removal more tricky. Pay attention to cracks, dents, or warping in the metal, as these might point to structural problems.
If you find rust or corrosion, consider treating those spots first. Rust can cause the door to break or get stuck during removal. Make sure the hinges are in good shape—free of excessive corrosion or damage. Also, check that no parts seem loose or broken.
Doing a thorough inspection now helps you spot potential problems early. This way, you can plan accordingly, making the removal process smoother and avoiding damage to the safe or door.
Reinstall or Store the Door Safely for Future Use
After removing the gun safe door, it’s crucial to either reinstall it securely or store it properly if you plan to keep it out of use. Proper storage helps keep it safe while still allowing quick access in case of an emergency.
Store the door in a secure, dry place that’s out of reach of children and unauthorized people. Keeping it in a safe spot ensures safety and peace of mind.
Lay the door flat or stand it upright on a stable surface to prevent warping or damage over time. This simple step helps maintain the door’s condition.
Cover the door with a cloth or padding to protect it from scratches or dirt. It’s a handy way to keep it clean and in good shape.
Finally, label the storage area clearly as safekeeping material so you can find it easily when you need to reinstall or during emergencies.
Troubleshoot Common Problems When Removing a Gun Safe Door
Removing a gun safe door can sometimes present unforeseen challenges, but addressing common issues quickly can save time and prevent damage.
One common problem is the door being stuck due to rusted hinges or tightly secured bolts, often worsened by accumulated gun safe accessories. Carefully inspect the hinges and bolts, applying lubricant if needed.
Inspect hinges and bolts carefully, applying lubricant to free stuck gun safe doors.
Fireproof features can also complicate removal, as some safes have reinforced doors with special locking mechanisms. If you encounter resistance, double-check the locking bolts or internal latch system before forcing the door.
Misaligned parts, especially if the safe has been recently moved, may require gentle realignment. Always handle components carefully to avoid damaging fireproof insulation or internal wiring.
If you’re unsure, consulting the safe manufacturer’s instructions or a professional can prevent costly mistakes.
Staying patient and methodical guarantees you avoid unnecessary damage and helps you safely remove the safe door.
Frequently Asked Questions
Can I Remove the Gun Safe Door Without Professional Help?
Yes, you can remove a gun safe door without professional help if you’re comfortable with DIY tasks. Just be sure to work carefully and patiently.
Start by disconnecting any decorative hardware and interior storage components. Once that’s done, follow step-by-step instructions to release the hinges.
Make sure to support the door during removal so it doesn’t fall or get damaged. Taking your time and working carefully will help avoid harming the safe or affecting its security features.
What Safety Precautions Should I Take During Removal?
Removing a gun safe door isn’t a chore to take lightly. It’s like handling a fragile masterpiece, so take your time.
First, disconnect your alarm system to prevent any accidental triggers. Wear sturdy gloves and eye protection for safety, and make sure you understand how the locking mechanism’s tension points work.
Keep a clear workspace and work slowly to avoid injury or damage. Prioritizing safety helps you prevent accidents and keeps your house secure during the removal process.
How Do I Identify the Hinge and Bolt Types?
To identify hinge types, check how the door attaches to the safe. Is it a continuous hinge, pin hinge, or concealed hinge?
For bolt mechanisms, see if they slide or turn. Some bolts are operated by a handle or key, while others are part of a lock system.
Recognizing these details helps you understand how to remove the door safely and efficiently.
Is There a Risk of Damaging the Safe During Door Removal?
Removing the safe door does carry some risk of damaging the safe if you’re not cautious, especially regarding hardware compatibility.
You need to carefully follow safety considerations to avoid harming the locking mechanism or the safe’s structure.
Using the right tools and observing proper techniques guarantees you prevent dents, scratches, or misalignments.
Always stay attentive to these factors so you can safely remove the door without jeopardizing its integrity or function.
How Long Does the Door Removal Process Typically Take?
Removing a gun safe door usually takes around 30 minutes to an hour, depending on your experience. Think of it like choosing weekend entertainment—you’ll need patience and some preparation.
During the process, follow maintenance tips to avoid causing any damage. It’s similar to tuning up a car—taking your time helps everything run smoothly.
If you’re cautious, it’s a manageable job that ultimately saves you time and effort in the long run.
Conclusion
Removing your gun safe door might seem like a simple task, but it’s actually more of an adventure that calls for patience, precision, and a little bravery.
Follow these steps carefully, stay alert, and handle every hinge and bolt with care—because one wrong move could turn your safety mission into a chaos catastrophe.
With steady effort, you’ll conquer this task and restore order and peace to your safe and your peace of mind. You’ve got this!