Mastering Your Aim by Adjusting Your Red Dot Sight
Struggling to get your shots on target with a red dot sight? You’re not alone. Many shooters find it tricky to master their aim, even with high-quality optics. Whether you’re new to red dot sights or just want to improve your accuracy, understanding how to properly set up and adjust your sight can make all the difference.
To master your aim with a red dot sight, start by securely mounting it and zeroing at a known distance using clear targets. Adjust windage and elevation knobs to align the dot with your point of impact.
Maintain steady body position and consistent eye placement to minimize parallax errors.
Adapt brightness for lighting conditions and regularly check battery life. Periodically re-zero after handling or impact shifts.
Perfecting these steps will set you up for precise, reliable shooting. Explore further to refine your skills even more.
Key Takeaways
- Calibrate your red dot sight using windage and elevation knobs to align the reticle precisely with the point of impact. This ensures your shots hit exactly where you aim.
- Use stable support and keep your body and eye position consistent. This helps maintain steady sight alignment and improves your accuracy.
- Select clear, appropriately sized targets. Also, confirm zero at multiple distances to make sure your aiming stays reliable.
- Adjust brightness and clean the lens regularly to keep the reticle visible under different lighting and weather conditions.
- Perform regular maintenance, check battery life, and re-zero the sight after any movement or impact. This keeps your performance consistent every time.
Red Dot Sight Basics You Need to Know
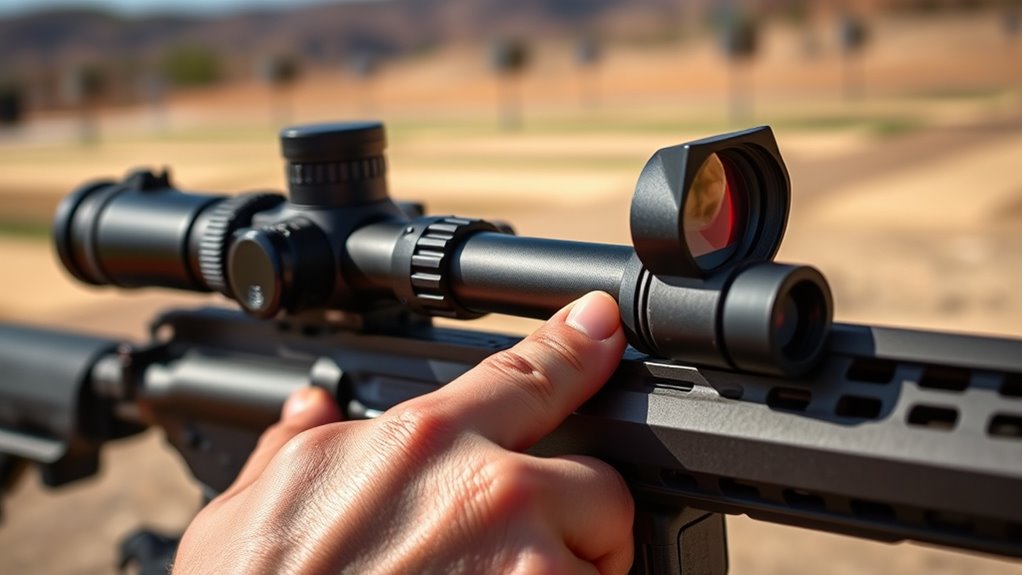
Before you can master your aim with a red dot sight, you need to understand its basic components and how they work. The main parts include the lens, the LED emitter, and the adjustment knobs.
Red dot calibration is essential; it ensures the dot aligns accurately with your point of impact. You’ll use the windage and elevation knobs to make these precise adjustments. Keep in mind that even slight movements can shift your zero, so check calibration regularly.
Precise calibration with windage and elevation knobs keeps your red dot aligned and maintains shooting accuracy.
Battery longevity is another key factor. Most red dot sights use small batteries designed to last thousands of hours, but you should always monitor power levels to avoid surprises during use.
Some models feature auto-shutoff or adjustable brightness to extend battery life. By understanding these basics, you’ll be better equipped to maintain your sight’s performance and improve your shooting accuracy consistently.
Choosing the Right Target for Zeroing Your Red Dot Sight
When zeroing your red dot sight, selecting the right target plays a crucial role in achieving accurate results. Target selection directly impacts how easily you can spot your shots and make precise adjustments. You want a target that offers clear visibility and a defined aiming point, such as a bullseye or a grid pattern.
These features help you quickly assess sight alignment by showing exactly where your red dot hits relative to your intended point of impact. Avoid cluttered or overly complex targets, as they can confuse your focus and slow down the zeroing process.
The size of the target matters too. Choose one large enough to see at your zeroing distance but small enough to challenge your precision. Ultimately, a well-chosen target ensures you can efficiently fine-tune your red dot sight, improving your sight alignment and boosting your overall shooting accuracy.
Setting Up a Stable Position for Zeroing Your Red Dot Sight
To zero your red dot sight accurately, you want to find a stable position that keeps your body consistent shot after shot. A good place to start is by choosing a solid surface to rest on. You might also want to use some support gear like bipods or sandbags to help keep things steady.
Try to stay relaxed and keep the same posture throughout the process. Doing this will make it easier to make precise adjustments and get your sight dialed in just right.
Choosing The Right Surface
Where you set up your shooting position plays a crucial role in zeroing your red dot sight accurately. Choosing the right surface guarantees stability and consistency. Look for a flat, firm surface with a texture that prevents slipping. Rougher textures often provide better grip.
Avoid slick or uneven surfaces that can cause your setup to shift during adjustments. Consider material compatibility; some materials, like wood or metal, offer solid support. Others might absorb recoil differently, affecting your aim.
If you’re using a bench rest or sandbags, make sure they complement the surface to maintain steadiness. By carefully selecting a surface with proper texture and compatible materials, you’ll create a reliable foundation that helps you zero your red dot sight more effectively.
Maintaining Consistent Body Position
Although choosing the right surface is crucial, maintaining a consistent body position is just as essential for zeroing your red dot sight accurately. Start by focusing on posture alignment. Keep your spine straight, shoulders relaxed, and feet firmly planted.
This stable foundation reduces muscle fatigue and improves your shooting precision. Next, practice breathing control. Avoid rushing your shots. Take slow, deep breaths and exhale halfway before squeezing the trigger to minimize movement.
Consistency in how you position your body and control your breath ensures each shot aligns closely with the last. By mastering these fundamentals, you’ll create a reliable baseline for adjustments, making zeroing your red dot sight faster and more effective every time.
Utilizing Support Equipment
Maintaining a consistent body position sets the stage, but adding support equipment can take your stability to the next level. Proper support equipment selection guarantees your red dot customization works in harmony with your setup, improving accuracy during zeroing.
Here’s how to optimize your position:
- Use a sturdy shooting rest or sandbags to minimize movement.
- Employ a bipod or tripod for consistent rifle elevation.
- Choose a comfortable bench or prone position to reduce fatigue.
- Incorporate a cheek riser or adjustable stock for perfect eye alignment with your red dot sight.
Adjusting Windage and Elevation on Your Red Dot Sight
To hit your target consistently, you’ll need to adjust the windage and elevation settings on your red dot sight. These adjustments are essential for optic alignment and reticle calibration. They ensure your point of aim matches the point of impact.
Start by zeroing your sight at a known distance. Then use the adjustment knobs to move the reticle horizontally (windage) and vertically (elevation). Small clicks change the reticle position incrementally, so make precise adjustments.
Here’s a quick reference for adjustments:
| Adjustment Direction | Effect on Point of Impact |
|---|---|
| Windage Right | Moves impact left |
| Windage Left | Moves impact right |
| Elevation Up | Moves impact down |
| Elevation Down | Moves impact up |
| One Click | Varies by sight model |
Confirming Zero at Different Distances
After adjusting windage and elevation, you’ll want to confirm your zero at different distances to guarantee accuracy across your shooting range. This step verifies your red dot sight performs reliably no matter where you aim. Start by using laser alignment to check your initial zero at a close distance, like 10 yards. Then, progressively move out to longer ranges.
Confirm your zero at varying distances to ensure your red dot sight delivers reliable accuracy throughout your shooting range.
- Set your target at 25 yards and fire a group, noting any deviation.
- Adjust magnification if your sight allows, to fine-tune clarity at mid-range.
- At 50 yards, repeat your shots, confirming the point of impact remains consistent with your dot.
- Finally, test at 100 yards, making minor windage or elevation tweaks if necessary.
Troubleshooting Common Red Dot Sight Zeroing Issues
If your red dot sight isn’t holding zero, it’s time to figure out what’s causing the drift. First, take a look for any parallax errors. Also, make sure your mount is nice and stable. Fixing these common issues will help keep your aim consistent and reliable.
Identifying Zero Drift Causes
When your red dot sight suddenly shifts off target, it’s usually a sign of zero drift caused by common issues you can fix. Understanding these causes helps you maintain precise aiming techniques and proper sight alignment. Here are four key reasons for zero drift:
1. Loose Mounting
Check if your sight is securely mounted. Any movement affects zero.
2. Recoil Impact
Heavy recoil can gradually shift the sight’s position.
3. Environmental Factors
Temperature changes can alter the sight’s internal components.
4. Mechanical Wear
Over time, internal parts may loosen or degrade, causing drift.
Correcting Parallax Errors
Zero drift isn’t the only challenge that can throw off your red dot sight’s accuracy. Parallax errors can cause your point of aim to shift when you move your head or change your eye position. To fix this, focus on parallax correction.
Start by ensuring your sight alignment stays consistent. Center the dot on your target while keeping your eye in the same spot relative to the sight. Many red dot sights have adjustable parallax settings. Use these to minimize any shift in the reticle as you move your eye.
If your sight lacks this feature, practice maintaining a consistent sight picture to reduce parallax effects. Correcting parallax errors sharpens your aim so you hit your target precisely every time.
Ensuring Mount Stability
Although a properly zeroed red dot sight is essential, your accuracy can still suffer if the mount isn’t stable. Ensuring mount stability is key to maintaining consistent sight alignment and reliable shot placement. Here’s how you can secure your red dot sight effectively:
- Use proper mounting techniques. Tighten screws evenly to avoid uneven pressure that could shift your sight.
- Check for any movement after mounting by applying firm pressure to the sight; it shouldn’t wiggle.
- Use thread locker on screws to prevent them from loosening due to recoil or vibrations.
- Regularly inspect your mount and sight alignment before each shooting session to catch any shifts early.
Mastering these steps guarantees your red dot stays steady and your aim remains true.
How Weather and Lighting Affect Red Dot Accuracy
Because weather and lighting conditions constantly change, they can considerably impact your red dot sight’s accuracy. Weather effects like rain, fog, or dust can obscure your lens, making it harder to see your red dot clearly. Moisture buildup or dirt can distort the reticle, so you need to keep an eye on these conditions and clean your sight promptly.
Lighting conditions also play a vital role. Bright sunlight might wash out the dot, forcing you to adjust brightness settings to maintain visibility. Conversely, low-light or shadowed environments require you to increase brightness without causing excessive glare.
Overcast skies or sudden changes in light can trick your eyes, so you must adapt quickly. By understanding how weather effects and lighting conditions influence red dot performance, you’ll make smarter adjustments in the field, ensuring your aim stays sharp regardless of the environment.
Maintaining Your Red Dot Sight for Consistent Performance
To keep your red dot sight performing reliably, you need to maintain it regularly and properly. Neglecting maintenance can reduce color contrast and affect sight brightness, which can compromise your aim. Here’s what you should do:
- Clean the lens carefully Use a microfiber cloth to remove dust and smudges without scratching the lens. This helps preserve clear color contrast.
- Check and adjust sight brightness Make sure brightness settings suit your environment. This prevents the dot from being too dim or overly bright.
- Inspect battery life frequently Replace batteries before they run low to keep the sight brightness consistent and avoid sudden outages.
- Secure mounting screws Tighten screws to keep the sight stable. This ensures your adjustments don’t shift during use.
When and How to Re-Zero Your Red Dot Sight
You’ll know it’s time to re-zero your red dot sight when your shots consistently miss the target, or if the dot shifts after some rough handling. It’s pretty straightforward to tell when something’s off. To get things back on point, you’ll need just a few basic tools and a clear step-by-step process. So, let’s walk through how to spot these signs and adjust your sight for perfect accuracy.
Signs You Need
If your shots consistently land off target despite proper technique, it’s a clear sign your red dot sight needs re-zeroing. This isn’t just about modern shooting. Historical applications show that precise aiming has always been vital, reflecting the cultural significance of marksmanship across societies.
Watch for these signs:
- You notice a sudden change in impact points after a recoil-heavy session.
- Environmental factors like temperature shifts or rough handling affect your sight’s alignment.
- Your red dot appears blurry or misaligned when switching between shooting positions.
- You’ve replaced batteries or disassembled the sight without rechecking zero.
Recognizing these signs guarantees your red dot stays true, honoring the age-old tradition of accuracy and precision.
Step-By-Step Process
Although many shooters overlook it, regularly re-zeroing your red dot sight guarantees consistent accuracy and confidence on the range or in the field. Start by confirming your sight’s battery life is strong; a dim dot can mislead your aim.
Next, choose a target with good color contrast against your surroundings for clear visibility. Set up at your preferred distance, then fire a group of shots to identify where your rounds land.
Adjust the windage and elevation turrets accordingly, moving the dot to align with your point of impact. Repeat this process until your shots consistently hit your intended mark.
Tools Required
Consistently re-zeroing your red dot sight starts with having the right tools on hand to make accurate adjustments. Just like creative photography requires precise equipment, mastering your aim demands specific items. Understanding the historical context of red dot sights highlights the evolution of these tools and why accuracy depends on the right gear.
Here’s what you’ll need:
- Screwdriver or Allen wrench to adjust the windage and elevation screws.
- A stable shooting rest to ensure consistency during zeroing.
- Targets for clear impact visualization.
- A notebook or camera to record settings and document changes, much like a photographer captures details.
With these essentials, you’ll re-zero your red dot sight effectively and efficiently.
Advanced Zeroing Tips for Various Firearms
When you’re zeroing a red dot sight on different firearms, understanding each weapon’s unique characteristics is essential. Start by considering ammunition selection; different loads can shift point of impact, so use consistent ammo during zeroing to maintain accuracy. Also, apply proper sight mounting techniques. Ensure your sight is securely mounted and aligned with the bore axis to avoid parallax errors.
For rifles, zero at a distance that balances bullet drop and trajectory for your typical use, often 50 or 100 yards. Handguns usually require a closer zero, around 7 to 15 yards, due to shorter sight radius and bullet trajectory. Shotguns with red dots benefit from a zero that accounts for shot spread. Try zeroing at 25 yards for buckshot patterns.
Keep environmental factors in mind, like wind or lighting, which affect different firearms uniquely. By tailoring zeroing methods to each firearm and ammo, you’ll maximize your red dot’s precision across all platforms.
Frequently Asked Questions
Can Red Dot Sights Be Used Effectively for Moving Targets?
Yes, you can use red dot sights effectively for moving targets. You’ll need to focus on target tracking and speed adjustment to stay ahead.
By keeping the red dot aligned with the target’s movement, you’ll improve your chances of hitting it. Practice adjusting your aim quickly as the target changes speed or direction.
With consistent training, your ability to track and engage moving targets using a red dot sight will greatly improve.
How Do Battery Types Affect Red Dot Sight Performance?
Battery types subtly influence your red dot sight by shaping its endurance and energy use. Choosing a battery with strong longevity means your sight stays reliable longer, sparing you frequent swaps.
Power efficiency plays a key role too. A more efficient battery ensures consistent brightness without draining quickly. So, selecting the right battery keeps your sight sharp and dependable, letting you focus on your target without worrying about sudden power loss.
Are There Specific Red Dot Sights Recommended for Left-Handed Shooters?
Yes, some red dot sights are designed with left-handed ergonomics in mind, making sight adjustment easier for you. These models often feature controls positioned for left-handed use, ensuring quick and intuitive adjustments without compromising your grip.
When choosing a sight, look for ambidextrous or specifically left-handed options that let you fine-tune your aim comfortably. This way, you’ll maintain accuracy while benefiting from a setup tailored to your shooting style.
Can Red Dot Sights Be Used in Conjunction With Magnifiers?
You can use red dot sights with magnifiers, with careful attention to co witness compatibility and mounting preferences. Pairing them lets you switch from quick target acquisition to improved detail effortlessly.
You’ll want to guarantee your magnifier mounts securely behind the red dot without obstructing your line of sight. By aligning your setup for seamless co witness, you’ll maintain accuracy and speed, making your shooting experience more versatile and effective.
What Are the Legal Restrictions on Mounting Red Dot Sights on Firearms?
You need to guarantee legal compliance when mounting red dot sights on firearms, as laws vary by location. Some places require registration for firearms with certain accessories, including optics, so check local regulations closely.
In general, red dot sights themselves aren’t heavily restricted, but you must avoid modifications that change the firearm’s classification. Always verify registration requirements to stay within the law and avoid penalties.
Conclusion
Now that you’ve mastered adjusting your red dot sight, imagine the thrill of your shot landing precisely where you aim, every time. The wind whispers, the light shifts, but your sight holds steady, guiding your bullet true.
With each careful tweak and steady breath, you’re not just aiming, you’re commanding your firearm with confidence. Keep practicing, stay sharp, and watch as your red dot sight becomes an extension of your will in the field.