How to Switch Ammo Types in Ready or Not
Switching ammo types in Ready or Not can be a bit tricky, especially when you’re in the heat of combat. Many players find themselves fumbling through menus, losing precious seconds that could make or break the mission.
If you’re looking to gain an edge, mastering how to change ammo types quickly is essential.
To switch ammo types in Ready or Not, access the weapon menu through the main menu or radial wheel, then select your firearm. From there, examine the available ammo options using the scroll wheel or directional keys, and confirm your choice to change ammo without losing focus.
Practice quick switches for faster responsiveness in combat. If you’re curious about more tips and techniques, you’ll find plenty of useful strategies to optimize your ammo management.
Key Takeaways
- Access the weapon menu or radial wheel to see your available ammo options.
- Use the scroll wheel or directional keys to pick and explore different ammo types.
- Confirm your choice to switch ammo while keeping your focus on the weapon.
- Make sure your weapon supports the ammo type you want to switch to before confirming.
- Practice quick switching in training to get better at it during actual gameplay.
How to Access and Navigate the Ammo Menu in Ready or Not
Have you ever wondered how to quickly change your ammunition in Ready or Not? Accessing and browsing the ammo menu is key for effective weapon customization.
To start, open the game’s main menu or use the radial wheel during gameplay, depending on your control setup. Find the weapon icon and select it to bring up the weapon and ammo options.
Within this menu, you’ll see different ammo types, each with info on ammo durability—important for knowing how long your rounds last before needing a reload. Use the scroll wheel or directional keys to explore available ammo and confirm your choice to switch.
This process allows you to tailor your loadout for specific tactical situations while keeping your performance optimal. Remember, weapon customization isn’t just about aesthetics. Choosing the right ammo impacts durability and your overall effectiveness in the field.
Mastering this menu helps you adapt quickly without disrupting your flow during critical moments.
What Ammo Types Are Available in Ready or Not?
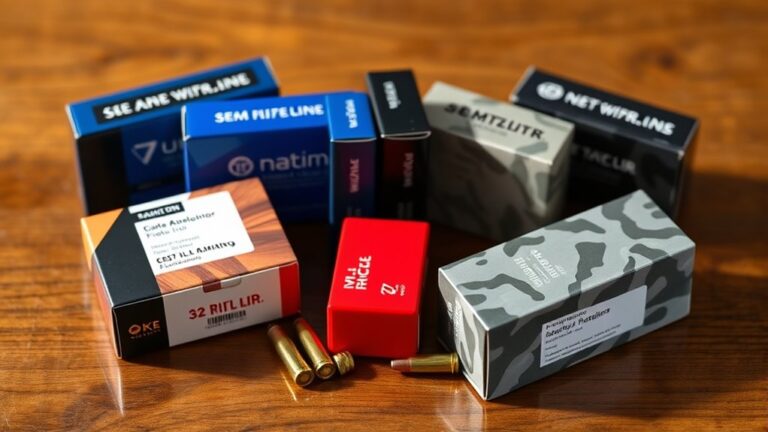
In Ready or Not, there’s a pretty good mix of ammo types you can choose from, depending on what you need for the situation. You’ll mainly see the standard rounds like 9mm and .45 ACP, which are the go-to for everyday encounters. But it doesn’t stop there—there are also some specialized options like armor-piercing and tracer rounds.
These rarer and more specialized ammo types can really come in handy when you’re facing tough enemies or specific tactical challenges. So, it’s pretty important to know what’s available, so you can pick the right ammo for the job and keep your team one step ahead.
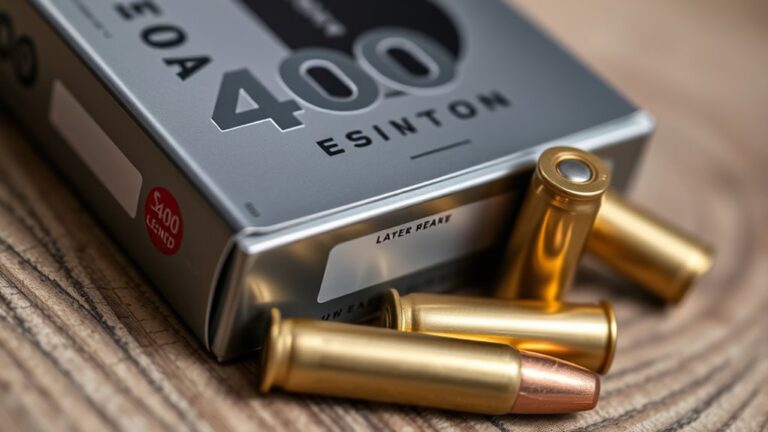
Common Ammunition Types
What kinds of ammunition are at your disposal in Ready or Not? You’ll encounter common types like 9mm, .45 ACP, and 5.56 NATO rounds. These are standard for most firearms and deliver reliable performance.
Each ammo type has specific durability, meaning some sit longer without degrading. They also have distinct ballistics, which affect range, penetration, and recoil.
For example, 9mm rounds produce less recoil and are great for quick shots, while 5.56 NATO rounds pack more stopping power at longer distances. Knowing these differences helps you pick the right ammo for the situation.
While these common types are versatile and easy to find, understanding their core traits is key. It guarantees you optimize firearm performance during critical moments.
Specialized and Rare Ammo
Beyond the standard ammunition, Ready or Not also offers specialized and rare ammo types that can give you an edge in specific situations. These unique ammo options improve weapon customization and can be vital for ammo conservation, especially during long encounters.
For example, armor-piercing rounds work well against heavily armored enemies, while tracer rounds help with target tracking. Explosive or hollow-point rounds deliver devastating effects but may be limited in supply.
Using these specialized types strategically can help you save ammo and adapt to different combat scenarios. Make sure to switch ammo types thoughtfully, considering your current needs and tactical goals.
Familiarity with these rare ammo options ensures you’re prepared for any mission, maximizing your weapon’s effectiveness when standard rounds aren’t enough.
How to Change Ammo Types Quickly During Gameplay
Want to switch up your ammo types smoothly during gameplay? The key is to get the hang of the quick ammo cycle method. It lets you change your ammo on the fly without messing up your momentum. It’s all about keeping your focus and staying prepared for anything that comes your way.
Don’t forget to take advantage of weapon attachments like ammo counters or quick-release magazines. These little upgrades can make swapping ammo a lot faster and more straightforward. Just a bit of practice with these techniques, and you’ll be able to adapt instantly and stay one step ahead in any situation.
Quick Ammo Cycle Method
Need to switch ammo types quickly while in the middle of a firefight? The quick ammo cycle method helps you do just that by maximizing ammo compatibility and minimizing reload speed.
First, make sure your weapon supports multiple ammo types. When you want a rapid change, crouch or pause briefly. Then, use the dedicated ammo switch button, usually assigned to a shortcut.
This allows you to switch ammo types instantly without going through the entire reload process, saving valuable time. Keep practicing this quick cycle to become more efficient during intense moments.
The key is to familiarize yourself with your weapon’s ammo compatibility and master the timing to switch seamlessly. This approach keeps you adaptable, letting you respond swiftly to changing combat situations.
Using Weapon Attachments Effectively
Have you ever wondered how your weapon attachments can make switching ammo types faster and more effective during combat? Using the right attachments, like quick-detach magazines and specialized chokes, can really streamline the process.
Attachments also help you manage ammunition weight, reducing the burden of carrying multiple ammo types. This allows for better ammo conservation because you’re less likely to waste shots or carry excess rounds.
For example, switching to a lightweight magazine enables faster swaps and reduces fatigue during extended engagements. Keep your attachments well-maintained and familiar to quickly change ammo types without losing precious seconds.
Mastering this coordination ensures you stay adaptable, conserve ammo efficiently, and remain ready for any encounter.
When and Why Should You Switch Ammo in Ready or Not?
Understanding when and why to switch ammo in Ready or Not can really make a difference in your firefights. You should think about switching ammo types when you need to conserve your primary ammo, especially during long engagements, or when your weapon setup suggests certain ammo benefits.
Switching allows you to tweak your weapon’s performance based on the situation. For example, armor-piercing rounds work better against heavily armored targets, while hollow points are great for stopping power at close range.
Ammo conservation is key when supplies are tight, helping you stretch what you’ve got. Changing ammo types can also boost your accuracy and damage, giving you an edge when it counts.
Just keep an eye on your remaining rounds and the situation around you. Knowing when to switch can help you make your weapon fit each scenario, maximizing your efficiency and chances of survival during missions.
Best Situations to Use Different Ammo Types
Different ammo types shine in specific combat situations, so choosing the right one can give you an essential advantage. If you’re facing heavily armored enemies, switching to armor-piercing rounds helps you stay effective without wasting shots.
When engaging unarmored or lightly protected targets, using standard or hollow-point ammo preserves your weapon’s energy and increases chances of a quick takedown. For hostage situations or crowded areas, you might want to conserve ammo by selecting less lethal options or optimized rounds to improve accuracy and reduce unnecessary shots.
Ammo conservation becomes crucial in longer engagements, so knowing when to switch can stretch your supply and ensure you’re always prepared. Weapon customization also plays a part—some guns handle certain ammo types better, maximizing both performance and efficiency.
Ultimately, adapting your ammo choice to the situation allows you to optimize your firepower and manage resources wisely during mission-critical moments.
Choosing Ammo for Different Enemy Types
When facing different enemy types, choosing the right ammo can make all the difference between a quick kill and a long fight. Your weapon customization options let you optimize your firearm for specific targets, but understanding what ammo works best is key.
Different enemies react differently depending on the ammo you use. For example, armored foes need high-penetration rounds like armor-piercing (AP) ammo. Unarmored enemies, on the other hand, are better suited to less lethal options.
Here are some tips: Use hollow points for close-quarters fights to cause maximum damage without over-penetrating. Switch to full metal jacket (FMJ) rounds when facing enemies behind cover for better penetration. Match your ammo to the enemy’s armor and flesh to get the most effectiveness.
Always double-check your weapon customization settings to make sure your chosen ammo is compatible with your firearm. Picking the right ammo helps conserve resources and ensures you deliver precise, effective strikes.
Tips for Seamless Ammo Switching During High-Pressure Encounters
Switching ammo quickly during intense moments can make or break your effectiveness, so practicing efficient handovers is essential. Prioritize weapon customization to streamline the process and customize reloads for quick access. Use your HUD to pre-select the right ammo and minimize changeover time. To stay effective, conserve ammo when possible—fire only what’s necessary—so you’re not forced into quick swaps.
Here’s a helpful table to optimize your ammo switching:
| Strategy | Benefit |
|---|---|
| Preload weapon with preferred ammo | Faster switching in combat |
| Use specific weapon configs | Reduces time spent changing ammo |
| Keep spare magazines accessible | Eliminates awkward searches |
| Practice quick reload drills | Builds muscle memory |
| Monitor ammo count regularly | Prevents unexpected shortages |
Efficient weapon customization and ammo conservation help you stay ready for high-pressure encounters, making seamless changeovers when every second counts possible.
Troubleshooting: Why Can’t I Change Ammo and How to Fix It
If you can’t change ammo during gameplay, it can really hurt your chances in critical moments. This issue often comes from overlooked weapon problems or game mechanics. To troubleshoot, start by making sure your weapon is well-maintained—cleaning and inspecting it regularly can prevent glitches that block ammo switching.
Trouble switching ammo? Regular weapon maintenance and checking game controls can prevent frustrating glitches.
Next, check your weapon’s current state; some guns might have restrictions after firing or during certain animations. Finally, verify your ammo conservation settings and game controls, as accidental changes can disable your ability to switch ammo types.
Here’s what to look for:
- Ensure your weapon isn’t jammed or stuck in a firing animation.
- Confirm your controls are correctly mapped and not conflicting.
- Keep your weapons maintained to avoid glitches affecting ammo switching.
Dealing with these issues helps keep your weapon ready for any situation, ensuring smooth ammo management and maximum effectiveness.
Advanced Strategies for Managing Ammo and Maximizing Weapon Effectiveness
Effective ammo management is key to keeping up sustained firepower and staying adaptable under pressure. Planning your ammo use carefully becomes especially important during shortages.
Make sure to switch between ammo types depending on the target and situation—armor-piercing rounds for heavily armored foes, and regular rounds for softer enemies.
Weapon customization really helps; upgrade your gear with attachments that boost ammo efficiency or reduce reload times to keep your firepower going longer.
Keep track of your remaining rounds and avoid wasting ammo on unnecessary shots. Carry a variety of ammo types to be ready for different combat scenarios, but don’t overstock, as that can drain your supplies too fast.
Practice quick switching techniques so you can change ammo or reload swiftly with minimal downtime.
Summary: Mastering Ammo Switching to Stay Prepared
To stay prepared in Ready or Not, it’s important to get a good handle on the different ammo types and know which one to use in each situation. Being able to switch quickly between ammo types can really make a difference when things heat up—it keeps you adaptable and ready to respond on the fly.
Getting the hang of quick switching techniques allows you to move seamlessly during firefights, saving precious time and giving you an edge over your opponents. When you master these skills, you’ll be able to pick the best ammo for the moment, helping you stay sharp and ready for whatever comes your way.
Understanding Ammo Types
Have you ever wondered why choosing the right ammo type can make a difference in your gameplay? Different ammo types vary in their ballistics comparison, affecting accuracy, range, and stopping power. Understanding these differences helps you pick the best for each situation.
Some rounds might deal higher damage but have lower penetration, while others could be more cost-effective. Keep in mind the ammunition cost, as it influences your overall efficiency—expensive rounds may make you conserve ammo more carefully.
Knowing when to switch ammo types can give you a tactical edge. To help, consider these key points:
- Ballistics comparison impacts your shooting effectiveness.
- Ammunition cost affects your resource management.
- Choosing the right type depends on the scenario’s demands.
Quick Switching Techniques
Switching ammo types quickly can give you a tactical edge during gameplay. To do this smoothly, get familiar with your weapon’s reload speed and how ammunition durability impacts switching speed.
Use hotkeys or quick select options if you have them, so you can swap ammo types on the fly without digging through menus. Keep your preferred ammo within easy reach, especially if durability is high but reload times vary.
Practicing quick switching in training mode helps build muscle memory, so you can change ammo quickly during fights. These steps make sure you’re always ready with the right ammo, keeping your offensive or defensive game strong when it matters most.
Optimizing Ammo Choices
Ever wonder how to choose the best ammo for every situation? Optimizing your ammo choices is about understanding which rounds fit your mission.
Focus on ammo durability to make sure your rounds don’t jam or misfire under pressure. Recoil management is just as important — lighter ammo can help you stay accurate and control your weapon during rapid-fire.
To stay prepared, consider switching to high-durability rounds when facing tough opponents or thick cover. Using lighter, low-recoil ammo is great for quick shots and sustained fire.
Finally, balance the type of ammo based on enemy armor or environmental hazards. This way, you’re always ready for whatever comes your way.
Frequently Asked Questions
Can I Carry Multiple Ammo Types for the Same Weapon?
You can’t carry multiple ammo types for the same weapon at the same time in Ready or Not. To switch ammo types, you need to customize your weapon, which lets you change attachments and ammo compatibility.
Managing your ammo inventory is really important. It’s best to plan ahead and carry different types in your inventory so you can swap them out when needed.
This way, you’re prepared for different combat situations without carrying too much gear.
How Does Ammo Switching Affect Weapon Accuracy?
Switching ammo types in Ready or Not can be a double-edged sword. Your weapon’s accuracy might wobble, as if it’s got a mind of its own.
Ammunition versatility is great until reloading strategies falter, causing shot spread to widen or causing missed shots.
Is There a Penalty for Switching Ammo Mid-Fight?
Yes, switching ammo mid-fight can have a penalty, like a slight delay caused by ammo conversion. This can slow down your reload speed and throw off your timing.
You need to be quick and strategic because changing ammo types during combat causes a brief interruption, making you vulnerable. It’s all about planning ahead and managing your ammo options carefully.
Do Different Ammo Types Have Different Recoil Patterns?
Imagine different paintbrushes creating unique strokes; that’s how ammo types influence recoil patterns in Ready or Not.
Each ammo type’s recoil pattern varies—some kick more, others stay steady. Switching ammo types shifts your gun’s behavior, so you need to adapt your aim.
Can AI Teammates Also Switch Ammo Types?
AI teammates cannot switch ammo types on their own, but you can coordinate with them to get the most out of different ammo advantages.
You can give commands to have them hold specific weapons with the preferred ammo or assign roles that focus on certain ammo benefits.
Good coordination with AI teammates helps you use ammo types for armor penetration or less recoil, making your strategies more effective during missions.
Conclusion
Mastering ammo switching in Ready or Not keeps you one step ahead, especially in intense firefights. Did you know that players who adapt their ammo types efficiently are 30% more likely to survive high-pressure encounters?
Being able to quickly switch ammo not only saves your life but also maximizes your weapon’s effectiveness. Practice these tips, stay adaptable, and you’ll be better prepared to handle any situation the game throws at you. Mastering ammo switching in Ready or Not is essential for staying alive and winning your encounters.